Friday, September 30, 2011

A work in progress...

A lot of you have asked for me to share more of our new home with you, but I am not there yet. Soon my dears, it takes time and I am far too particular to just let anything slide. While cruising thought Pinterest I found this and it pretty much sums up my philosophy...

via Pinterest

So truthful, now go and purge if you need to or pick up that special item that you know would be perfect in your home. Happy weekend! Mel xo

Find me on Twitter, Facebook, & Pinterest

Wednesday, September 28, 2011

Sneak Peek: Laundry Room


I am almost done with this space so I thought I would share a couple of images with all of you. As I say all the time, every.single.room in your home is special and deserves to be amazing. I still have a long way to go but I am so happy with the progress so far, so without further ado, my laundry room...


I headed out to Ikea a couple of weeks ago and picked up 10 of the white Ribba frames, the perfect addition to the space. It allows me to be surrounded by my boys while I seem to do endless amounts of laundry.


And of course, my Visual Comfort touch in this room, 3 of the Simple Scallop Pendants in soft silver. I wanted something fun and whimsical and this was the perfect addition. The other circle on the ceiling is my speaker so I can have a little dance party while I am folding & ironing, love that!


So that is a space I spend a lot of time in, just a warning, I will be sharing this again once I am done DONE with it and we have it photographed. There are a few fun things I designed into the room...but you will just have to wait to see those. Mel xo

**Sharing with Just A Girl!**

Find me on Twitter, Facebook, & Pinterest

Tuesday, September 27, 2011

Recipe: Chicken & Shrimp Coconut Curry Soup

This is a house hold favorite here, the boys gobble it up and always ask for seconds. Now that the leafs are starting to turn this will make its way into our meal rotation a few times a month. Here is a wonderful and easy dish I am sure all will love...


1 T. canola oil
1 finely chopped white onion
2 t. red curry paste
1.5 t. curry powder
1/2 t. ground tumeric
1/2 t. coriander
2 garlic cloves, minced
6 cups chicken stock
1 can light coconut milk
1 lb diced raw chicken breast
400 grams rice noodles 
*I use Kame Stir-Fry Thai Rice Noodles
1/2 C. chopped green onions
2 T. white sugar
2 T. fish sauce
1 lb. shrimp, peeled
1 package spinach, chopped
3 small hot red chilies, seeded & chopped
3/4 C. fresh cilantro
lime wedges


Heat oil in large pot, add onion and saute till translucent. Mix curry paste, curry power, turmeric, coriander, & garlic and continue to saute for 1 minute. Add chicken stock, diced chicken, & noodles to the pan and bring to a boil. Add coconut milk and reduce heat, simmer till the chicken is almost done, about 15 minutes. Add in sugar, fish sauce, shrimp, spinach, and chilies. Continue to simmer until the shrimp is cooked and the spinach is wilted. Serve with fresh cilantro and a lime wedge...ENJOY! Oh and another thing, this is actually low in fat and healthy, crazy flavor for an amazing dish. Mel xo

Monday, September 26, 2011

How To: Haunted House

I posted this last year and I still get e-mails about it, so I thought it would be the perfect time do a little re-post about one of my favorite items...the haunted house I made for Halloween. Once it is up in the foyer they boys know that trick or treating is just around the corner.

Since I made this a few years ago before a blog was even a concept for me I didn't take progress images, but I will try to give you all the details so you can create your own as well. The first thing that you will need to decide on is what doll house kit to use, 
for my project I used the Arthur Dollhouse Kit


I had Rob cut a piece of MDF that was 4" bigger than the size of the dollhouse so I had room to decorate. Once you have that you can start off by building the house and getting it all set up. When it is dry start to get it all ready for the Halloween season by painting it. I used an orange base paint and then used diluted black paint on top to give it a 'dirty' look.
When placing the shutters around the windows put them on crooked, make it look dilapidated and worn. That is what would scare you away from a home, isn't it? For the shingled I stained them with the diluted black paint as well for a weathered look. Add a bit of moss to the corners with a glue gun and let the scary factor grow.


For the base of the house use a glue gun to place more moss around for the ground. Along with moss I added twigs to the roof and the sides of the home. A place like Michale's has some small Halloween items that are perfect for this project where they keep the Halloween villages, I managed to pick up the little trees and a few skeletons from there.


Check out THIS site for some fun Halloween items to add to the surroundings. Pumpkins, headstones, spooky skeletons. This is where you can really make it your own!


So that is the low down on the haunted house that graces our foyer every year, I hope that you take on the challenge of making one yourself. It is sure to be a crown pleasure and something children will look forward to seeing year after year.


I am thinking that I will make a new one next year, one that suits our new home better. Then again, this one is pretty awesome so I may scrap that idea! Mel xo

Thursday, September 22, 2011

Equestriain magic...

One thing I love about living out of the city is the land and the horses on nearby properties that we see everyday. There is something magical about horses, even on the inside of the home...

 via Country Living

 via Garret Cord Warner

 via Tumbler

 via Restoration Hardware

 via Pinterest

via Pinterest
 via Carson Poetzl

And if you are info something a bit more 3D there is this option that leaves me speechless...

via Tumbler

OK, so the last one is clearly a joke, could you imagine?! HA! Hope the day finds you well, another busy one for me but I know it will be another great one. Mel xo

Wednesday, September 21, 2011

A love letter...

Dear Cameron table lamp by Visual Comfort in Quartz,


     You are OMGoodness amazeballs! BUT with a retail price of close to $3,000, yep, that is right I feel like we may never have our time together. Why are you so amazing and SO expensive? Even with my trade account you are still too far out of reach for me at this time. I can only hope that one day we will meet and we can sit by the fire together, read together, blog together, and just be together. Until then, I love you. 
(yes, that was a love letter to a lamp)

I guess I can introduce you to Cameron's siblings. While they are not as stunning as Quartz they are still nice...but come on, how could you ever love anything else after seeing the original?
 Meet Parchment...

and Crystal...

Quarts is where it is at, that is all I gotta say. Mel xo

If you are interested in any items by Visual Comfort feel free to e-mail me, I would love to help you find the perfect light for your space!

Tuesday, September 20, 2011

Mud Room: Take 3

I just want this room done. Every time I walk through it I stop, get frustrated, put on or take off my shoes and walk away. This needs to be a happy fun spot in the ol' hacienda since we enter & leave the home through this space. Here is where I am at now.

My totally awesome & kick ass lights from Visual Comfort finally arrived. Say hello to my 3 extra-large Hicks pendants in polished nickel. Aren't they lovely?


They are lined up perfectly with the transom windows on the doors, it might have taken a bit and my electrician might think I am crazy but it is just right.


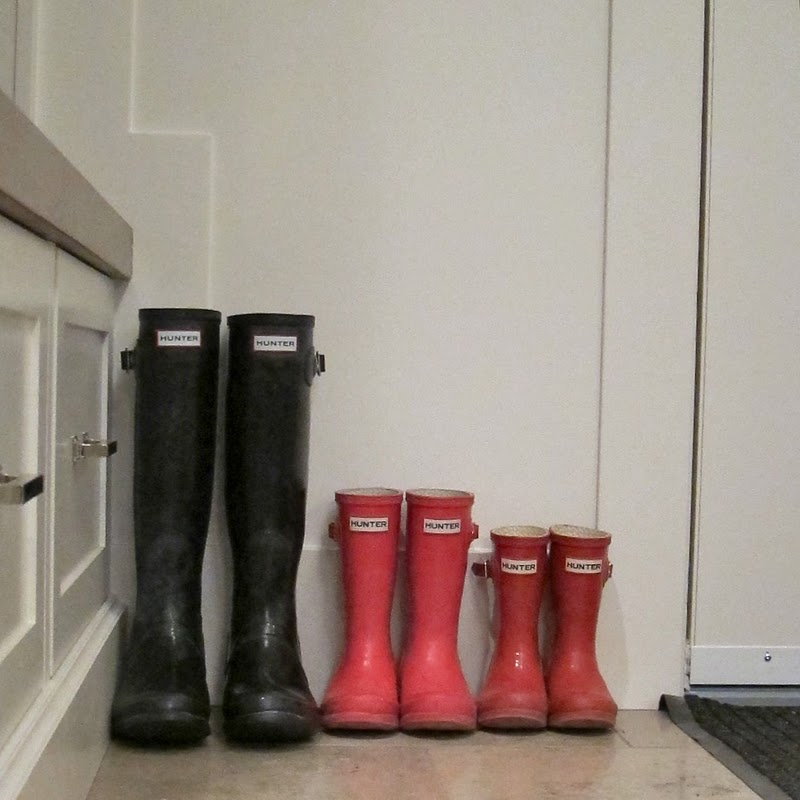
On a side note, love the adorable small Hunters next to my big old black ones, they make me giggle every time I see them.


Now onto the wall treatment. This space is too bland, I want to funk it up (but it still has to appeal to the Hubs) so here are my options for paper that we both (somewhat) agree on.

{opt 1}
 Hexagono by Tres Tintas

A bit busy but with frames added to the walls it would get broken up.


{opt 2}
 Light & Bright by Brewers

This is the Hubs favorite, but for some reason my sample is reminding me of fall & Halloween.


{opt 3}
 Hepburn by Kuboaa

Here it is in a virtual room, this image is the main reason why you always want to order sample, it may look blue but nope, it showed up black & white.


{opt 4}

I wish. I love this one  by Jordi Labanda but it got shot down faster than I can say 'babe'...


Which choice is your fave for the room? I will be adding fun pillows to the bench seating, frames in a contrasting accent color (thinking orange or red), and of course a durable rug that I will most likely keep neutral. Would love to hear your thoughts...I really want this room done, as in done like dinner! Mel xo

Monday, September 19, 2011

Back 2 Basics: White Subway Tile


I can't tell you how many bathrooms I use a simple white subway tile in & I have been thinking...it is time to use this for a kitchen again. I always get caught up in the stunning stone, glass, mosaic, VERY expensive tiles for the backsplashes. Why not go back to the basic and the well priced item?

via De Giulio Kitchens

You can mix it up a bit by running one row vertically along the bottom, an easy way to jazz things up.

via MidWest Living

Even though this detail (that I am loving) is out of painted brick you could easily get the same effect with tile.

via My Ideal Home

Carry it throughout, even the hood. This allows the windows and amazing lighting to take center stage.

via Kitchen Lab

Love the use of the tile on this massive wall in the Kitchen of the Year by House Beautiful. The contrast to the cabinets and those killer Visual Comfort French Library Double Wall Lights...adore.

via House Beautiful

Again, so many things going on in this kitchen, this is a great example of how the simplicity of the backsplash helps to pull it all together. Anything else would have been a distraction.

via House Beautiful

Going up, up, up to the ceilings. Also, take a good look and notice the small square tiles that they used every 5 rows to add some character.

via Tumbler

If you want to have fun...use black grout, not white or grey.

via Pinterest

And this one, I just love everything about this image...L-O-V-E

via La Dolce Vita

I am keeping this in mind for Altadore, this might help those killer vibrant brushed bronze faucets by Kohler (which killed the budget) take center stage. Hope your weekend was wonderful!! Mel xo

Friday, September 16, 2011

Pinterest finds this week...

Here are some of my favorite things I found while cruising the 'Discussions' pages on Pinterest this week.

{Chevron Here & Chevron There}

Dying over this tray. Someone pinned it from Etsy and yes, it is sold. *sigh*


How fun is this door design?! Such a great way to jazz up those bland plat panel doors. I think it would be perfect for a rental since you could easily do it out of tape so the landlord will stay happy. 


{Altadore Ideas}

Thinking that maybe this would be a great idea above one of the islands. Remember, I have 3 homes to do up in Altadore and I want them all to be individual.


Check out this vanity design, pretty fabtastic (yes, fab, not fan) if you ask me. Thinking Altadore I master bathroom?


{Party Hardy}

Brilliant! Why are the simplest things so amazing?! Love this for a larger cheese tray, no more guest wondering what they are munching on.


This is a MUST remember for future birthday parties.


{Decorating for the Seasons}

How funny is this? Supper excited around here for pumpkin carving time. These would also be fun for place card holders if you are hosting a dinner party around Halloween.


I am so doing this!

If you want to see some more fun things check out all of my boards HERE. Happy pinning & happy weekend! Mel xo
© 2013 Veranda Interiors